Designing a wheelchair accessible shower is something we take seriously because the right layout can completely change how comfortable, safe and independent a person feels in their own bathroom. When we plan these spaces, we focus on real usability and not just compliance. In this post, we are sharing the dimensions, turning spaces and layout options that reliably work in real homes and care settings.
Why Wheelchair Accessible Showers Matter to Us
A well-designed accessible shower gives people dignity, control and comfort. For us, the goal is always to create a space that allows someone to move freely, transfer safely and use the bathroom without unnecessary barriers. Good design should feel natural, intuitive and stress-free.
1. Key Dimensions We Use for Wheelchair Accessible Showers
Different countries have slightly different regulations, but these measurements work across nearly all standards and provide a strong, user-friendly baseline.
Shower Size
- Minimum recommended size: 1500 mm x 1500 mm
- Absolute minimum in many codes: 900 mm x 1500 mm for a roll-in shower
- Our preferred size: 1800 mm x 1800 mm or bigger for better manoeuvrability
A larger footprint makes a huge difference for turning, positioning and caregiver support.
Thresholds and Entry
- We always aim for a zero threshold and a fully flush entry
- If a small threshold cannot be avoided, we keep it between 6 mm and 10 mm with a gentle bevel
A smooth transition helps prevent wheels from catching and makes rolling much easier.
Turning Circle
- Standard full turning radius: 1500 mm diameter
- Turn alternative: three clear arms of 900 mm each
We make sure this space is completely unobstructed by fixtures.
Clear Space at Shower Entry
- Minimum 900 mm x 1200 mm just outside the shower
This allows front, angled or side transfers depending on the user.
2. Fixtures and Fittings We Recommend
Grab Bars
- Mounting height between 850 mm and 1000 mm
- Horizontal bar on the back wall
- Vertical or angled bar near the controls or entry
- All bars should support 250 to 300 kg
Shower Controls
- Height between 900 mm and 1100 mm
- Reachable from a seated position
- Lever-style or push-button designs for ease of use
Shower Head and Hose
- Handheld shower with at least 1500 mm hose length
- Height-adjustable slider bar
- Reachable from the shower seat
Shower Seat
- Wall-mounted fold-down seat
- Height between 450 mm and 500 mm
- Minimum size 400 mm deep x 450 mm wide
Slip Resistance
- Flooring rated R10 to R12, depending on regional standards
- We avoid tiny tiles because grout lines can slow down wheels
3. Real Layouts That We Know Work
These layouts come from years of practical experience in real bathrooms.
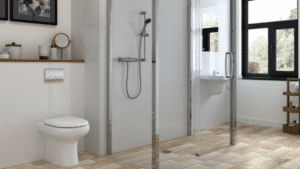
Layout 1: Standard Roll-In Open Plan
Best for: Users who shower independently and need lots of movement space.
Features:
- 1500 x 1500 mm shower zone
- No door. A curtain is optional
- Grab bars on the back and side walls
- Seat opposite the controls
- Plenty of turning space
Pros: Open and simple
Cons: Requires good drainage planning
Layout 2: Compact Transfer Shower
Best for: Smaller bathrooms and users who transfer onto a seat.
Dimensions:
- 900 x 1500 mm
- Seat on the long wall
- Grab bars on both long and short walls
Pros: Efficient and compliant
Cons: Not ideal for all wheelchair types
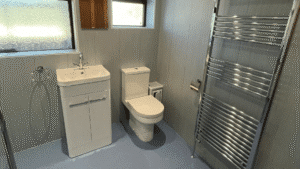
Layout 3: Full Wet Room Design
Best for: Homes with caregivers or long-term accessibility needs.
Features:
- The entire space is waterproof
- No dedicated shower enclosure
- Large open area for turning
- Ideal for ceiling track hoists if required
Pros: Very flexible and future-proof
Cons: More expensive and requires careful slope design
Layout 4: L-Shaped Shower Zone
Best for: Users who benefit from extra transfer angles.
Features:
- L-shaped footprint of at least 1800 x 1800 mm
- Allows side and angled transfers
- Gives carers space to assist
Pros: Extremely adaptable
Cons: Needs a larger bathroom
4. Common Mistakes We See and Avoid
- Mounting the seat too far from the controls
- Choosing raised or poorly designed drains
- Installing grab bars at the wrong height
- Adding shower screens that block access
- Sloping the floor too aggressively, which causes wheel drift
- Forgetting that every control must be reachable from a seated position
Designing for real use is always more important than designing for code alone.
5. Practical Tips We Use in Real Homes
- We choose matte, slip-resistant tiles with even drainage
- We line up the seat directly under the handheld shower
- We place lighting so controls are easy to see
- We recommend thermostatic valves to prevent burns
- We consider future mobility changes during every design
Our goal is always maximum independence with the least amount of effort.
Showers for Wheelchairs: Our Final Thoughts
Designing a safe and functional wheelchair accessible shower is one of the most valuable improvements you can make in a home. When we focus on generous space, thoughtful fixtures and proven layout strategies, we create bathrooms that truly work for real people. These principles support independence today and adaptability in the future.